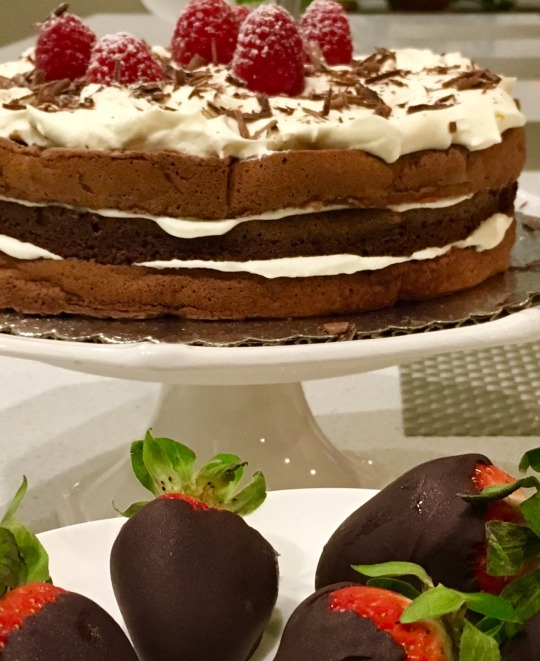

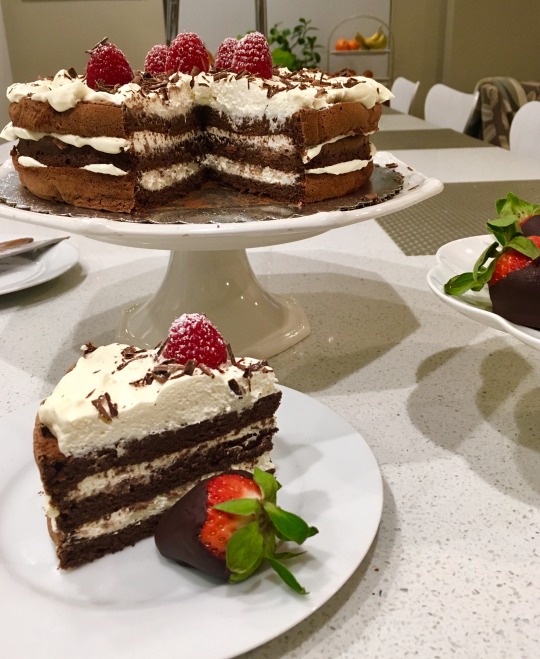
I first made this luscious rich chocolate cake which truly is lighter than air for Valentine’s Day. For V-Day I also dipped some strawberries in chocolate.
I was testing desserts to make for an upcoming class I held last week on Passover Desserts…The tag line being…
Some say Passover desserts are boring and tasteless…Sheila will share the recipes and techniques to make several Passover desserts so delicious you will want to serve them any time of the year!
The thing about desserts for Passover is you are not to use regular flour or the normal leavening agents such as baking powder or baking soda.
This can prove to be very challenging. Many recipes call for egg whites to be beaten until stiff and then folded gently into the batter to aid in the rising. This also is a technique which does take some practice to master.
Potato starch, almond flour, and matzo cake meal are also used in many recipes to replace regular flour.
Sponge cakes are very popular at Passover, and I make my mom’s extremely light Passover Lemon Sponge Cake every year. You can find that recipe here.
But I wanted something a bit more spectacular for this demo, and after sampling this cake decided it definitely is a dessert one would want to make any day of the year! (And the cake batter only includes three ingredients)!
Here are a few photos from the day of the class….
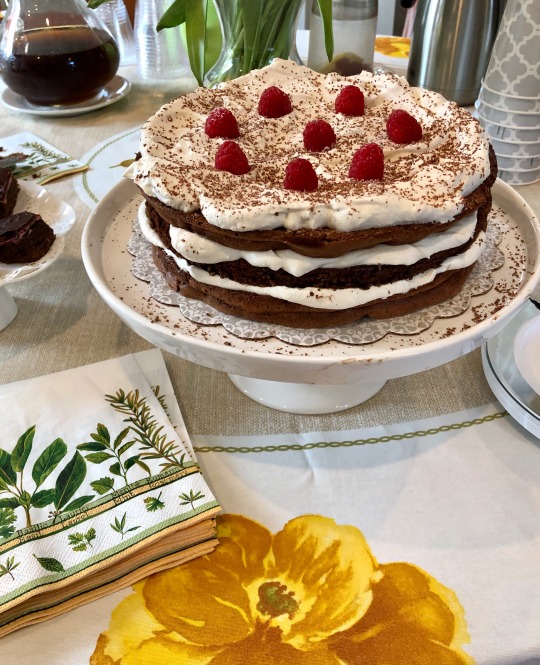
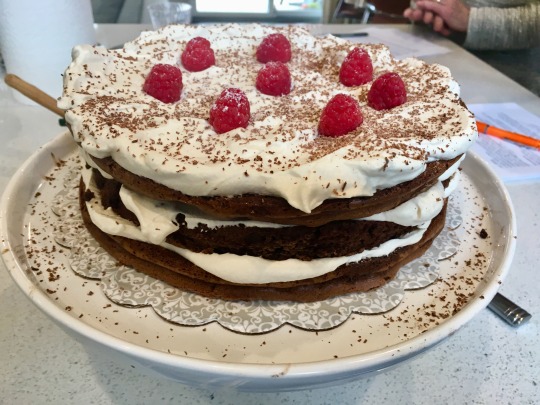
Below is the recipe which I adapted to make three layers instead of four from Smitten Kitchen’s blog.
Lighter-Than-Air-Three Layer Chocolate Cake (adapted from Lighter-Than-Air-Chocolate Cake from Smitten Kitchen’s Blog)
To make three 9-inch cake layers:
9 ounces dark or bittersweet chocolate, chopped (I like Trader Joe’s “Pound Plus Dark Chocolate with 54% cocoa solids)
4 and ½ tablespoons water
9 large eggs, separated, at room temperature
1 cup superfine sugar (I use Baker’s superfine sugar)
3/8 teaspoon salt
1 tablespoon plus 1 and ½ teaspoon Dutch-process unsweetened cocoa powder ( I use Guirardell brand)
For filling:
2 cups heavy cream
6 tablespoons confectioners’ sugar, sifted
2 tablespoons pure vanilla extract
(Note: options: 3 tablespoons Grand Marnier, 3 tablespoons Cognac and 1 teaspoon vanilla, 3 tablespoons cocoa and 1 teaspoon vanilla or 4 teaspoons instant-espresso powder or instant-coffee granules dissolved in 4 teaspoons water plus 1 teaspoon vanilla)
Procedure:
Make cake layers:
Preheat oven to 350 degrees F. Grease or spray with non-stick baking spray the three 9-inch round cake pans and line the bottoms with parchment cut out to fit the bottoms. Spray or grease lightly the parchment paper as well.
Melt the chopped chocolate with the water in a small heavy saucepan over very low heat, stirring until completely smooth. Cool to lukewarm.
Beat egg yolks, ½ cup of the sugar, and salt in a large bowl with an electric mixer until thick and pale, about 5 minutes in a standing mixer or about 8 minutes with a hand-held mixer.
Fold in the melted chocolate until blended.
In another clean large bowl, beat the egg whites with cleaned beaters until they just hold soft peaks.
Gradually add the remaining ½ cup sugar and beat until the whites just hold stiff peaks.
Fold 1/3 of the whites into the melted chocolate mixture to lighten, then fold in the remaining whites gently but thoroughly.
Spread the batter evenly over three baking pans and bake until puffed and top is dry to the touch, 15 to 18 minutes, rotating cakes between racks and if necessary, loosen edges with a knife.
When cool, sift cocoa powder over the top of cake layers and place a piece of waxed paper over the top of the pans.
Place a baking sheet over the paper and invert the cake onto it, gently pulling off the parchment lining.
Place the layers in the freezer for about an hour, until they are firm enough to be carefully lifted without breaking.
Make filling:
Beat cream with the confectioner’s sugar and vanilla (or optional flavorings, see note above) with cleaned beaters (or whisk attachment if using a standing mixer) until it just holds stiff peaks.
Fill and stack cake:
Bring the first cake layer out of freezer and arrange on serving platter, cocoa side down. Spread 1/3 of the filling evenly over the cake.
Bring the next cake layer out of the freezer, placing it gently over the filling, again cocoa side down. Spread with another 1/3 of the cream.
Repeat this process with the last layer, and whipped cream. (you may have some extra whipped cream ).
Keep the cake in the refrigerator until you are ready to serve it. Two hours should be more than enough to assure the layers are no longer frozen.
Garnish with grated chocolate, chocolate curls, and/or raspberries.
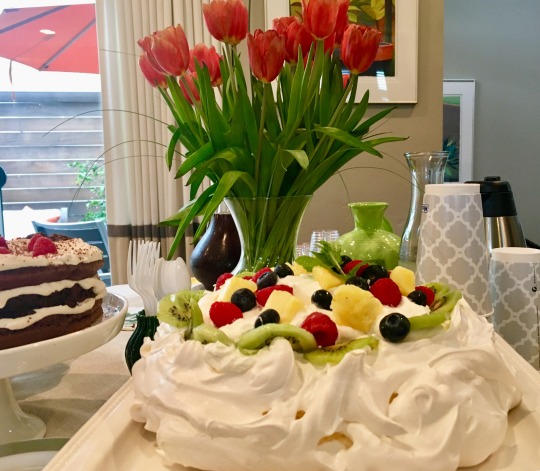
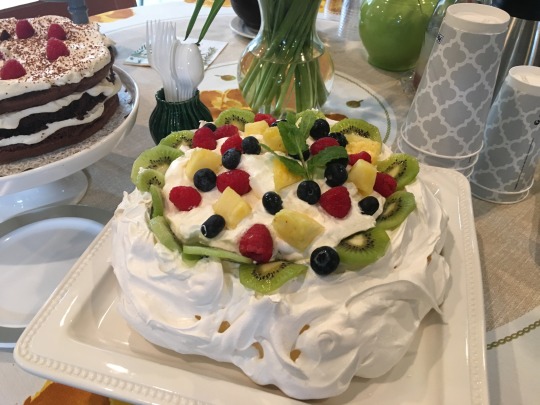
Another dessert which made the cut for this demo included my Pavlova. This is a large meringue nest filled with sweetened vanilla whipped cream and fresh fruit.
It makes a beautiful presentation, but is easier to make than you might think.. You can leave it in the oven overnight…ready to fill the next day!
The crunchy, marshmallowy meringue, creamy whipped cream and fresh fruit is a winning combination!
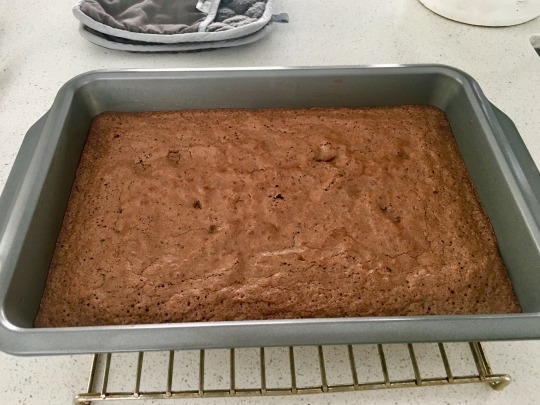
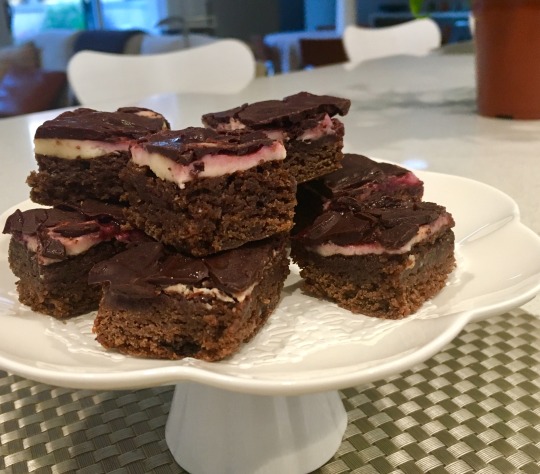
…and finally I included my Chocolate Raspberry Dreams, a brownie base with a layer of cream cheese, a layer of raspberry jam, and topped off with a dark chocolate glaze.
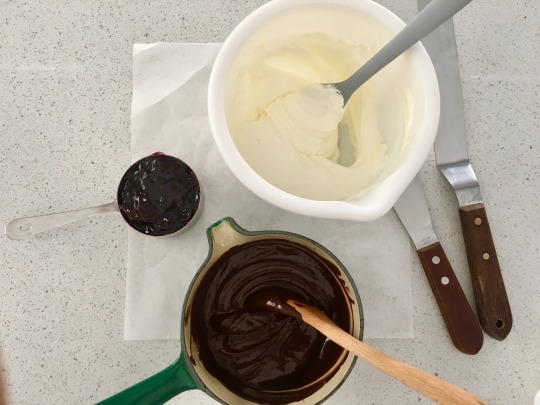
Baked in a 13 by 9-inch pan it makes a large quantity.. They can be cut into bars or smaller squares, and freeze well.

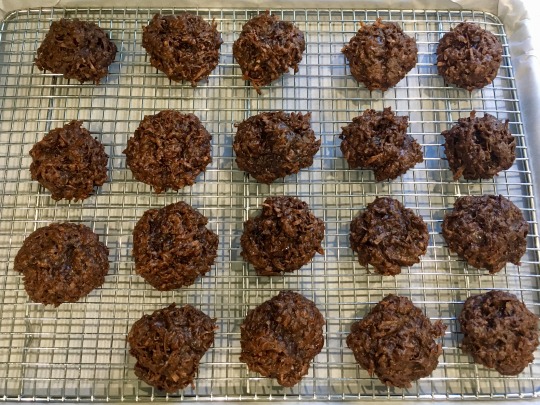
The brownie base calls for ½ cup of Passover chocolate macaroons. In the past I had used the store-bought macaroons which come in the tins. (and, to be kind, are not very flavorful).
This time I decided to make my own chocolate macaroons. Here is the recipe for the Double Chocolate Coconut Macaroons that went into these yummy bars.
These macaroons are wonderful with bits of dark chocolate throughout . I will be making these year round, but I have to say they made the Chocolate Raspberry Dreams even more delicious!
One recipe will give you the ½ cup needed for the Chocolate Raspberry Dreams, with plenty of macaroons left over. They can also be frozen.
Double Chocolate Coconut Macaroons (Yvonne Ruperti, Serious Eats)
Ingredients
7 ounces bittersweet or dark chocolate, chopped, divided
2/3 cup granulated sugar
¼ cup cocoa powder
3 large egg whites
¼ teaspoon salt
1 teaspoon vanilla extract
¼ teaspoon coconut extract
2 and ½ cups sweetened flaked coconut
Directions
In the microwave or in a bowl set over pan of barely simmering water, melt 5 ounces chocolate until smooth. cool slightly.
In a large bowl. whisk sugar with cocoa till combined. Whisk in egg whites, salt, vanilla, and coconut extract.
Whisk in chocolate mixture til smooth.
Fold in coconut and remaining 2 ounces of chopped chocolate.
Chill until firm enough to scoop, about 30 minutes.
Adjust oven rack to upper-middle position and lower-middle position. Preheat to 350 degrees F .
Line two baking sheets with parchment paper or a non-stick baking liner. If using parchment, lightly grease.
Using scoop or tablespoon, portion batter by two tablespoons each, spacing evenly onto pans (about 8 cookies per pan). Gently form into mounds.
Bake until set and center doesn’t look raw, 13 to 15 minutes. Let cookies cool on pan 10 minutes, then transfer to wire rack to cool.
The class was a great success, and I am happy to say many who attended plan to make some or all of the recipes they took home with them.
Everyone was able to taste everything, and some took goody bags home. Let’s just say everyone’s sweet tooth was more than satisfied that day!